Stampin’ Up! Tasteful Touches Stamp set – AGAIN! – Sympathy Thank you using the Stamparatus hinge technique
TUTORIAL/TOP TIP
Hi everyone. This is my first post since a family bereavement and it is only fitting that it is to show off the Thank You cards I made afterwards.
Although there is a great deal of inspiration out there (which I admit I needed as I definitely did not have any crafty mojo!) I ended up being inspired by a card that wasn’t actually a Sympathy Thank You card. When I realised it was making use of the Tasteful Touches Stamp set I was hesitant but I loved the idea so much I had to use it as inspiration and I guess it just speaks to the versatility of this set. The card I found on Pinterest was by an Australian Stampin’ Up! demonstrator called Sue Allen. Her blog is under Sue Allen Simply Craft go check her out she is very talented. I made a few tweaks – I made my card a DL or slimline card as some call them. I also swapped the Merry Merlot colour she used for Cherry Cobbler as I only had the ink and not the matching cardstock to make it all co-ordinate. It was great to have this important reason to get back into the craft room. It gave me a crafty focus and gave me crafty feels again to want to do more which I haven’t felt the last few weeks. Truly shows the power of having a hobby or creative outlet away from day to day life!
Colour combo for this project

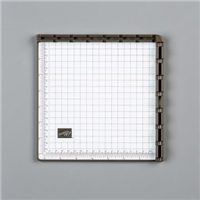
Straight from our website – “The Stamparatus was created by stampers for stampers, a must-have tool for all stampers, the Stamparatus helps you perfectly align stamp images, stamp multiples of the same project quickly and precisely, and get complete ink coverage.” For me the best part of this particular stamping platform (as there are many versions out here) is the open hinges. This allows you to move the plates down at set increments making repeat patterns so simple with no guessing and doing it by eye.

Set up whisper white cardstock to be stamped holding in place with the magnets provided. Line up un-inked image stamp on cardstock then bring over one of the plates to “pick up” the stamp. Ink it up and close the plate to stamp. Once first image is done leave the stamp on the plate and rather than take stamp from plate and realign by eye just moved the plate up or down to the next hinge space ink up the stamp again and close the plate over. Keep repeating as needed.

DL/Slimline base once folded 3 7/8 x 8 1/4
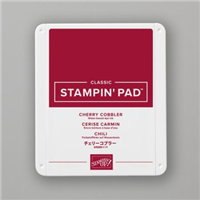
Cherry Cobbler matt 1 3 3/4 x 8 1/8
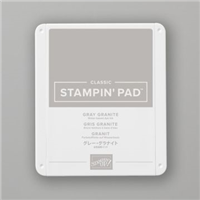
Grey Granite matt 3 1/2 x 7 7/8
Cherry Cobbler matt 2 3 1/4 x 7 5/8
Whisper White 2 3/4 x 7 1/8
Supply list
All the supplies used for these projects can be purchased via my “Shop” link to my online store in the top menu or by clicking on the images in the supply list below. Of course you can always contact me if you do not wish to order online. Don’t forget for all orders between £25 and £99 add the Host code for a free gift from me.


Beautiful card Amanda