Quick cards and top tips for clever batch making and easy coordination
Do you find it difficult to coordinate colours? Let me share my top tips with you for making quick and easy coordinating cards.
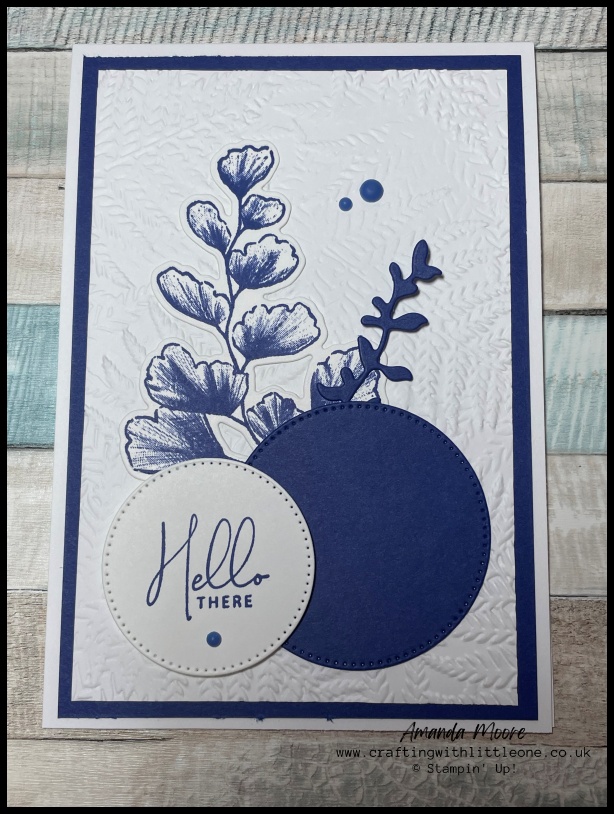
Stampin’ Up! have taken the guess work out of coordination. So if in doubt you can stick to the colours in the same colour family – Brights, Neutrals, Regals, Subtles and In-Colours because they all coordinate with each other.
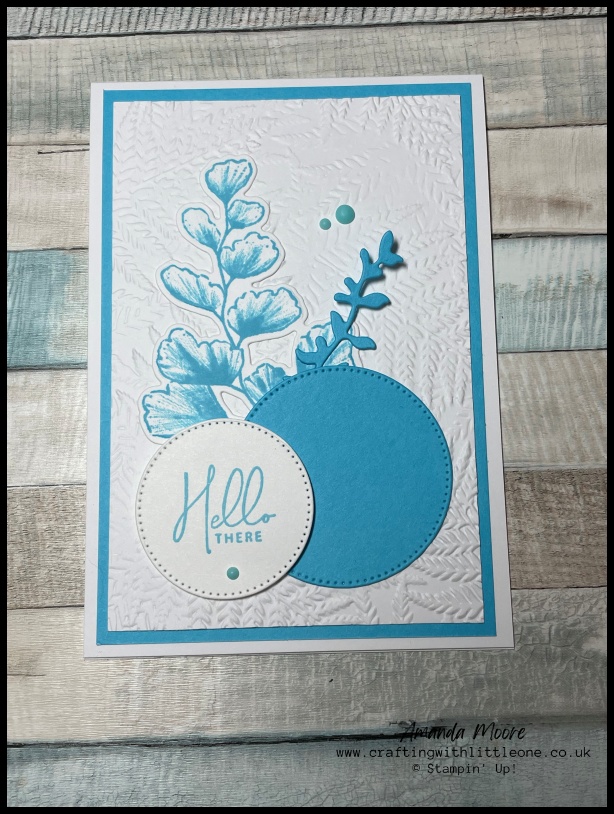
My favourite feature of the Stampin’ Up! colours is that their coordination goes beyond coordinating different colours, it is how the the same colour card stock, lets take Soft Succulent as an example, coordinates with the Soft Succulent ink pad, ribbon, embellishments and paper etc. So the same colour used across the line of products not only makes it super easy for you but is also very pleasing on the eye.
As a result this gives me confidence when I need to make quick cards and also when I need to make batches of cards.
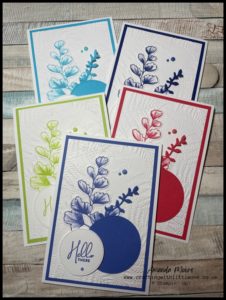
From this simple idea of using one colour my customer cards that I made and sent with their shiny new Annual Catalogue packs were born and it beautifully highlights the new In-Colours for 2022-2024 as the stars of the show.
Like magic here they are…
Card tutorial
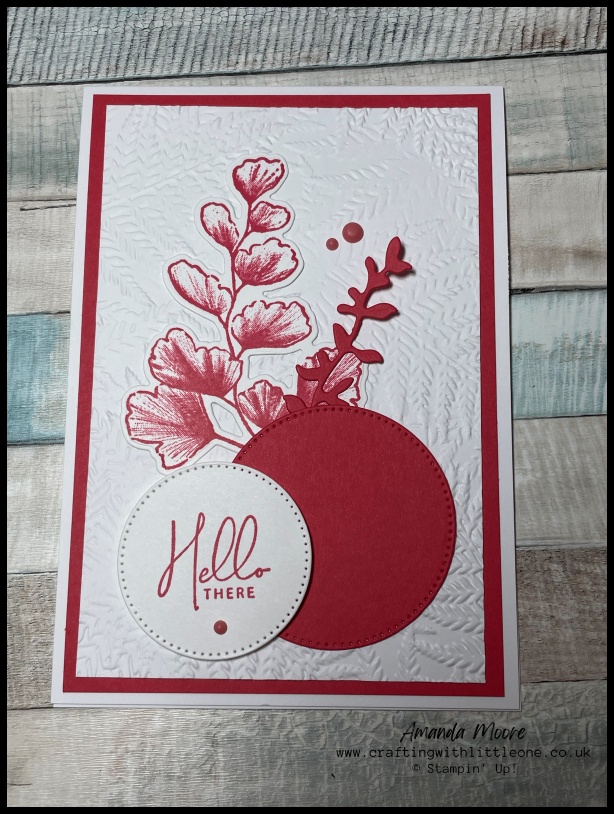

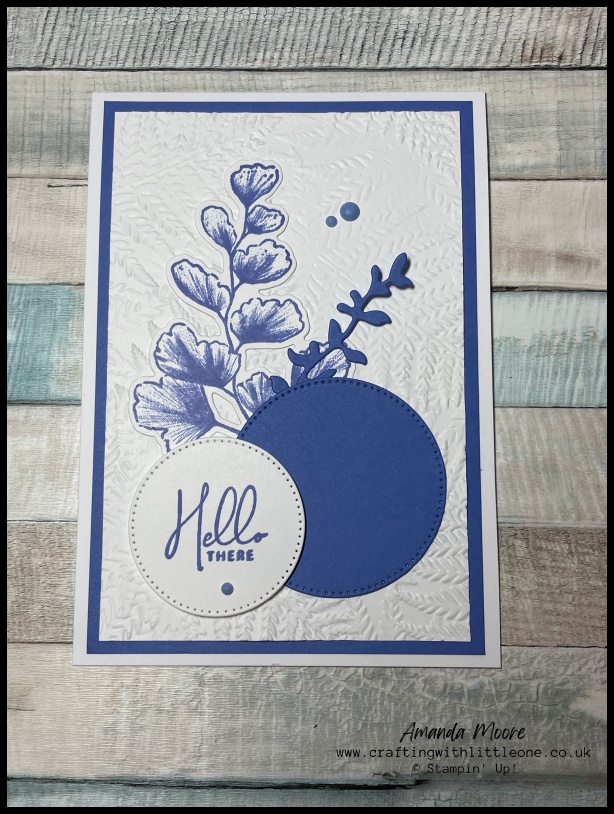
- Take an A4 sheet of basic white thick card stock and trim to 11 1/2″. The cut in half length ways at 4 1/8″. Use one half and score at 5 3/4″ to create your card base.
- Cut colour matt of your choice to 4″x 5 5/8″. Adhere to front of card base.
- FRUGAL CRAFTER TIP – before you adhere the colour matt to the base you could die cut the colour circle and foliage for the front from the center of this panel and the holes left will be hidden by the next layer!
- Using basic white card stock cut a topper to 3 3/4″ x 5 3/8″ and run this piece through the Fern 3D embossing folder and adhere to colour matt.
- If you did not die cut the pieces in the “frugal crafter tip” cut these now. Cut the colour circle using the circles from the stylish shapes dies and the sprig of foliage from the natural prints dies
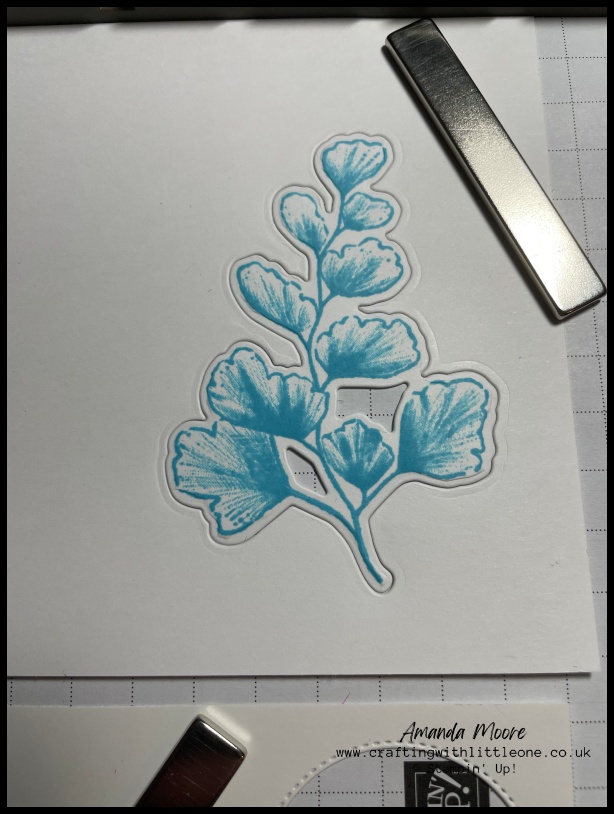
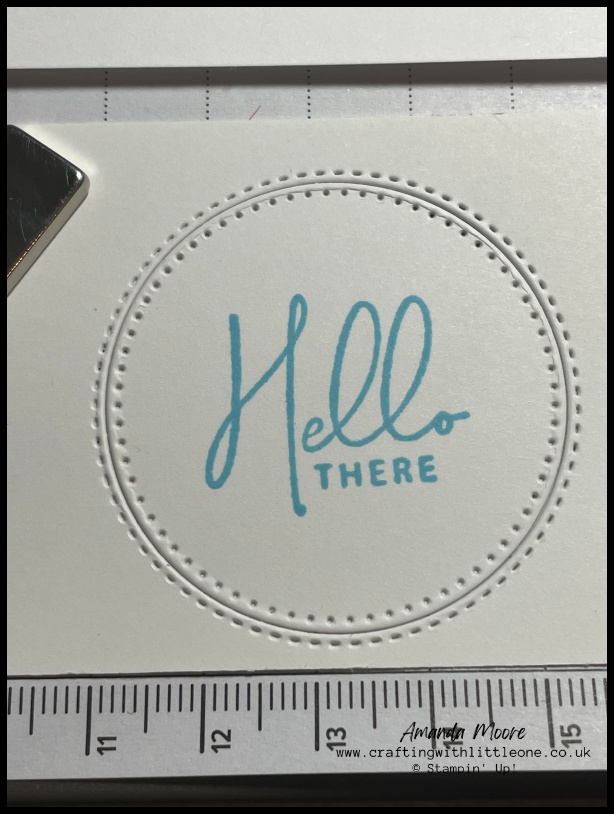
- On scraps of basic white stamp your greeting and the large branch image from the nature’s prints stamp set in the matching ink colour. Die cut the greeting from a smaller circle in the stylish shapes dies and the branch with the matching die from the natural prints dies. (see my batch tip below on how to get these lined up perfectly)
- assemble and adhere branch first with die cut foliage then die cut colour circle – all flat. Add the greeting on dimensionals.
- Finally add some coordinating gems from the in colour matte decorative dots pack.
Ooops! Almost forgot….
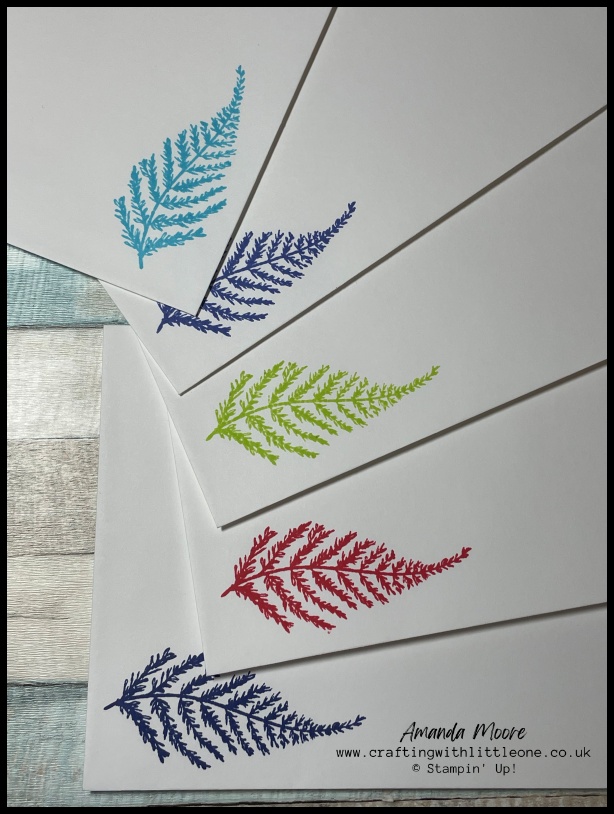
You can’t have a naked envelope!
Stamp the fern image in the matching colour ink for the perfect last touch of coordination.
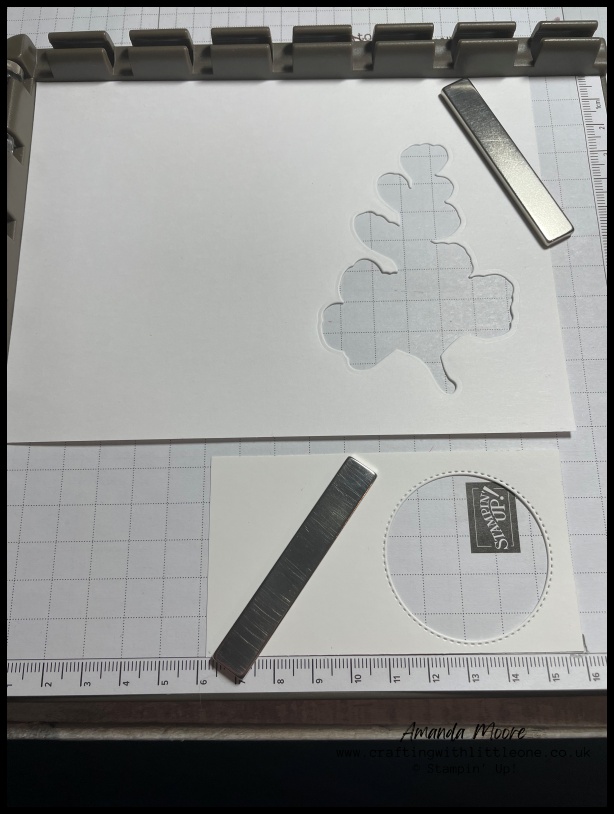
As promised a top tip for easier batch card making
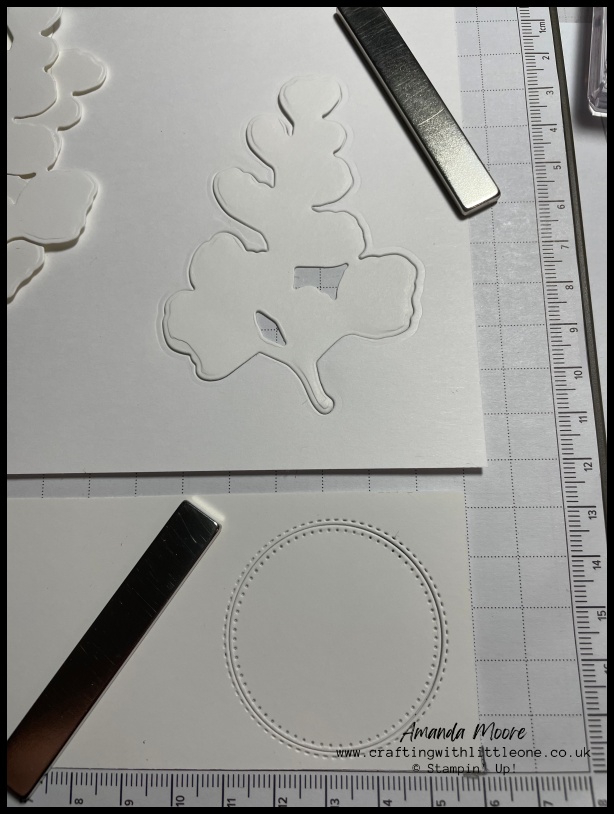
- From scraps of card die cut your required shape/shapes and secure what would normally be “the waste” on the Stamparatus with the provided magnets. Using these as a template line up your stamp with the cut out spaces and once happy close your Stamparatus plate to pick up the stamp
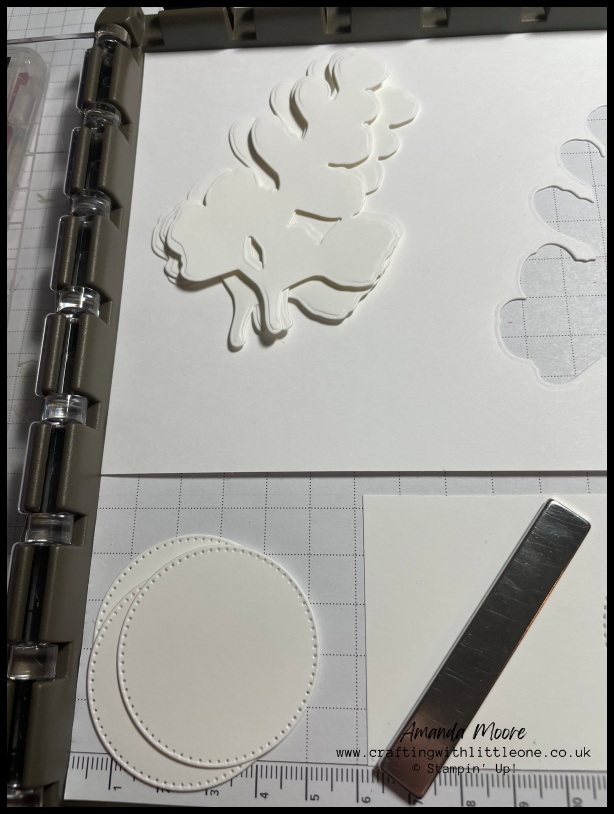
- Die cut blank die cut pieces – however many you require for your project
- Place one of your die cut blanks inside the template (I find it stays in place on its own)
- Ink up your stamp, close the plate over and watch the magic as it stamps in place perfectly every time. If you need to go again due to patchy ink etc just check the blank is still well placed in the template before re-stamping.
Supply list
All the supplies used to create this project are available by contacting me or by clicking on the images below. Don’t forget for all orders between £25-£150 add the Shopping/Host code for a free gift from me next month.
For orders of £99, why not purchase the Starter Kit and get £130 worth’s of supplies for just £99
If you live in Northern Ireland (or wider UK) and don’t have a Stampin’ Up! Demonstrator, I’d love to be yours so just reach out if you need anything from a paper catalogue to flick through with a cuppa or some Stampin’ Up! products.
I hope you have enjoyed your visit to my page. I hope even more that you will be leaving feeling inspired. As I’m just starting out all feedback will be gratefully received. Please also get in touch if there is a topic, theme or technique that you would like me to cover in future posts or if you have any questions you can’t find the answer to within my site.


Love this card
Aw thanks wee chum. Always my rock and giving encouragement x