Stampin’ Up! – Tutorial for making simple but stunning cards featuring Forever & Always die bundle.
TUTORIAL

These cards came about from a challenge my friend and myself set for our weekly crafty check in with each other. We both had this stamp and die bundle but had not used it yet. We had not got the rest of the suite (another stamp and die bundle and foiled card) and both felt it quite a challenge to come up with something without the help of the rest of the co-ordinating suite. On one hand it gives you freedom to go in any direction you like but of course the options are then endless and it can be overwhelming sometimes to know where to start.
Inspiration was found on Pinterest from Leena Girsa from Canada – go check out her beautiful work here! We loved the colour combo she used (Rococo Rose and Basic Grey) and how with stamping she had created her own background (no need for the matching Designer Series Paper)
My measurements are slightly different to Leena’s as I like to use a Thick Basic White card base as my foundation but lots of demonstrators use their coloured card as the base. Below I’ll list the sizes and different approach I took to each card. I’d love to know if you give these a try so do please tag me or send me pics!
PLEASE NOTE THAT ROCOCO ROSE IS ONE OF THE RETIRING COLOURS THAT WILL LEAVE US ON MAY 3RD (SEE PREVIOUS POST) IF YOU LOVE IT – GET IT IN YOUR BASKET!

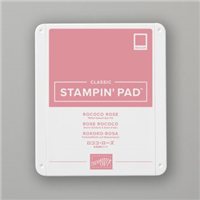
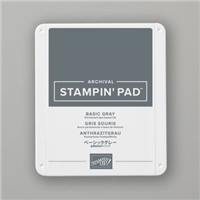
Rococo Rose & Basic Grey
CARD BASE – 4 1/8 X 11 5/8 (scored @ 5 7/8)
ROCOCO ROSE MATT – 4 x 5 3/4
BASIC WHITE MATT – 3 7/8 X 5 5/8
OMBRE MATT – 3 3/4 X 5 1/2
INSIDE PANELS (NOT SHOWN) ROCOCO ROSE MATT 3 7/8 X 5 5/8 WITH BASIC WHITE MATT 3 5/8 X 5 3/8
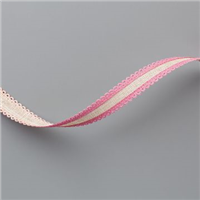
Both sized flowers from the stamp set were stamped in Basic Grey as well as some leaves onto the Ombre matt. The Ombre I used was a free Designer Series Paper from our February Sale-a-bration event. But this can be easily achieved with the Rococo Rose ink and our new Blending brushes onto Basic White cardstock. The “Always” was die cut in Rococo Rose for the word and the background outline die cut from Basic White card. (I believe on Leena’s she stamped the “Always” in Rococo Rose and cut that out with the background die – both versions look lovely) The word “together” was stamped in Basic Grey onto the Ombre paper and the die cut “Always” was raised on mini dimensionals for added dimension. I added some Rococo Rose trimmed ribbon for another texture and some champagne gems. Inside (not shown) I stamped some of the flowers on the edge of the Basic white layer before adding it to the Rococo Rose matt inside to tie everything together.

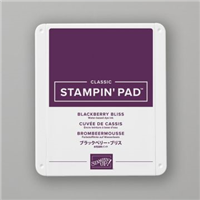
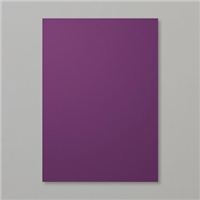
Blackberry Bliss
CARD BASE – 4 1/8 X 11 5/8 (scored @ 5 7/8)
BLACKBERRY BLISS MATT – 3 7/8 X 5 5/8
OMBRE MATT – 3 3/4 X 5 1/2
INSIDE PANELS (NOT SHOWN) BLACKBERRY BLISS MATT 3 7/8 X 5 5/8 WITH PURPLE POSY MATT 3 5/8 X 5 3/8
This second card came about from curiosity of what stamping in the same coloured ink as the Ombre colour (rather than Basic Grey) would look like and also wanting to use our new Adhesive Foam sheets for the first time to be able to cut just the word and no background die cut behind it. There is one less layer in this card as I did not think it needed the white matt between the card and Ombre paper. The flowers and leaves were stamped in Blackberry Bliss ink onto the Ombre paper of the same colour. “Forever &” was stamped in Blackberry Bliss also. This time the “Always” was cut from Blackberry Bliss cardstock that had been added to the Adhesive Foam sheet and all run through the die cutting machine together. A little patience is needed to separate the tiny pieces in the loops of the A, L,Y and S but totally worth it to have the whole word supported by the foam rather than having to cut tiny pieces of dimensionals small enough to hide behind the thin parts of the letters.

Inside
I just wanted to add a photo of the inside to show what I meant about the stamping of the flowers inside to tie it all together
The sentiment used is from the Dandelion Wishes stamp set
SUPPLY LIST
All the supplies used for these projects can be purchased via my “Shop” link to my online store in the top menu or by clicking on the images in the supply list below. Of course you can always contact me if you do not wish to order online. Don’t forget for all orders between £25 and £99 add the Host code for a free gift from me.


If you live in Northern Ireland (or wider UK) and don’t have a Stampin’ Up! Demonstrator, I’d love to be yours so just reach out if you need anything from a paper catalogue to flick through with a cuppa or some Stampin’ Up! products.
Thanks for visiting – feel free to leave comments or feedback. I’m still pretty much a newbie at this so all advice and suggestions greatly appreciated