Stampin’ Up! – In good taste DSP – Pretty paper = Pretty cards
TUTORIAL
Welcome back everyone. It’s been just over a week or so since I launched my site onto the world wide web. Thank you for the love and encouragement! I’ll admit that I was probably more indecisive about what to create for this post than I was my first one. I have so many ideas I want to share so deciding where to start was super difficult and meant I’m here a day later than I planned – but hopefully it’s worth the wait….
As we are in a new quarter there are so many new promotions to tell you about but before I do that I wanted to share some inspiration first and foremost. ( I will share the promotions in the next few days)
With this post I wanted to create something that spoke to crafters on a budget whether you be a beginner or avid crafter I created three cards starting at quick and simple moving to more detail to cover everyone – hopefully!
One of the prettiest items in the catalogues and most affordable is the range of Designer Series Paper (DSP). The variety covers every taste and style and are almost always double sided so there will always be a side of each sheet you will use. (but be warned sometimes you love both sides and can’t pick which side to use and that results in buying a 2nd pack!) In these three cards I’ll showcase the DSP in the leading role and demonstrate how you can make an impactful card without lots of bells and whistles if the budget won’t stretch.
Paper – Stamp – Ink

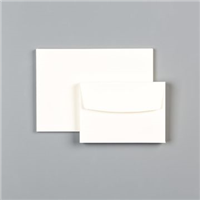
To keep things simple I started with a whisper white notecard base meaning the base is sized and scored for you. The Designer Series Paper was glued straight to the card base and the sentiment was stamped on a scrap piece of card and given the flag end using scissors. Stamp, ink and paper is all that is needed to make this quick and simple beginners card.
- Left side paper size – 2 1/2 x 5
- Right side paper size 1 x 5
- card strip over join 1/4 x 5
Paper – stamp – ink – die/punch

Again to keep things simple I started with a notecard base in very vanilla this time. I use these as they tend to be made from thicker card and are a good sturdy foundation for your card – I am also VERY frugal with my coloured cardstock. I often just cut a piece the size of the card front to add to the base rather than make my whole card base from the coloured cardstock as this is usually thinner card and it keeps more for my projects.
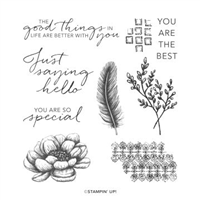
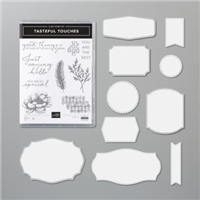
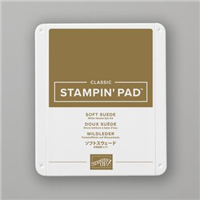
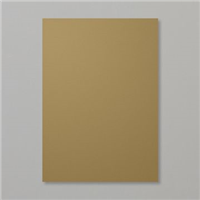
That’s what I did on this card I added a piece of soft suede cardstock to cover the front. I added a panel of the Designer Series Paper to a wider piece of very vanilla placing it down the center. I stamped the sentiment from the Tasteful touches stamp set onto a very vanilla scrap in Night of Navy ink and used a circle die from the Stitches shapes dies set to cut it out (a punch could also be used). I also stamped the branch from the same stamp set in Soft suede ink (stamping off twice in scrap paper) to make a watermark faint background to the sentiment. This was added to the card front. For additional co-ordination I used a scrap of the DSP left over to add some interest to the envelope flap – I do love to jazz up my envelopes! How cute!?
- Soft suede card front layer – 3 1/2 x 5
- Very vanilla center panel – 1 3/4 x 5
- DSP center panel – 1 1/2 x 5
Paper – stamp – ink -die/punch – embellishment

This card I made as an A6 sized card. I made my own card base from thick whisper white cardstock. When I make my own card base I like to make a “tent” fold with the card crease at the top rather than the side. Personally I think it looks a little unusual and more handmade. I make this base by cutting an A4 sheet in half lengthways (at 4 1/8 on short edge) and fold in half. Like the card above I only use the colour cardstock “face” the card front and not make the whole base.
TOP TIP – the way the layers are in this card you can “gut” the larger layers to make your crafting materials go further. The smaller layers of both can be cut from the center of the larger layers as they will be covered. You do need to be careful of placement if the boarder between layers is thin as there is a risk of the empty space showing
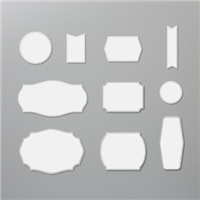
On top of the Night of navy layer placed to “face” the card front I added a Bumble bee layer with a layer of Designer Series Paper. I then created another panel of bumble bee and DSP but before attaching to the card I wrapped a length of bumble bee twill ribbon around the panel fastening at the back. I stamped the sentiment from the Tasteful touches stamp set in night of navy ink onto a scrap piece of whisper white and die cut this out with a label die from the Tasteful labels dies set and attached over the ribbon. Like the previous card I also decorated the envelope flap with a scrap of the paper to tie it all together.
- Night of navy card front – 4 1/8 x 5 7/8
- Bumble bee large layer – 3 7/8 x 5 5/8
- DSP large layer – 3 5/8 x 5 3/8
- Bumble bee small layer – 2 5/8 x 4 3/8
- DSP small layer – 2 3/8 x 4 1/8
Supply list
All the supplies used for these projects can be purchased via my “Shop” link to my online store in the top menu or by clicking on the images in the supply list below. Of course you can always contact me if you do not wish to order online. Don’t forget for all orders between £25 and £99 add the Host code for a free gift from me.


Shout out to the inspiration I found on Pinterest – inkpad.typad.com / stampitupwithjamie.com / stampnlingers.com